No-Sew Travel Pillow Case
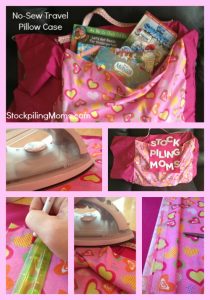

Whether your kids are headed to Grandma’s house, camp, traveling on vacation or visiting family for the Holidays, every kid needs their own Travel Pillowcase. What makes this pillowcase even better is not only does it allow your kids to store their toys to travel with nicely, but, anyone can make it! I
f you can use an iron you can totally make this No-Sew Travel Pillowcase that your kids will be delighted to show off! This would make a great gift for a birthday. This No-Sew Travel Pillow Case is perfect for Summer Travel! It makes a fun alternative to an Easter Basket or Christmas stocking too!
No-Sew Travel Pillow Case:
Supplies Needed
1 Pillow Case, ironed
1 ruler
1 pair scissors, fabric only
Iron, with Wool Setting
1 roll of Super Weight Stitch Witchery
1 Piece Felt (optional)
½ yard – 1 yard heavier type fabric (I used a light weight flannel)
½ yard Rope style handle
Instructions

1. Iron all fabric pieces (Pillow Case and ½-1 yard fabric) on a smooth, flat surface. This makes working with the fabric easier!

2. Now set your iron to WOOL. This is the iron setting the Stitch Witchery needs to activate properly.
Sizing the Fabric
3. Measure the width of your pillowcase. You want to determine the size of the fabric that you’ll need for the “pocket”, making sure it’s centered on your pillowcase. You’ll need to add an additional 1/2-3/4” all the way around for your folding marks. If your Stitch Witchery is wider than 1/2-3/4” you’ll need compensate for the width.
Hint: On the opening end of the pillow case end measure your border from the manufactured sewing mark. You don’t want to include the “flap” of the pillowcase in your measurements.
4. Carefully cut out the piece of fabric that you will now be working with. It doesn’t have to be perfect because you will be folding all the edges.
5. Layout your cut fabric right side up. Mark with a pen where you need to fold the fabric under. The markings should be about every 1/2” or so to ensure you fold a straight line.

* The width of your fold is going to be dependent on the width of your Stitch Witchery. From the edge of the fabric to your marking is where you will place the Stitch Witchery and attach to the pillowcase.
Attaching Fabric to Pillowcase with Stitch Witchery

6. Start with the top of your fabric. For the top, this is where you’ll be inserting books, crayons, toys, etc. so you are attaching the fabric to itself to create a nice seam.
Along the top side of the markings cut and measure your Stitch Witchery to fit the length. Fold the fabric under so you are creating the seam. Carefully place your cut piece of Stitch Witchery in between the crease of the fabric and lay flat.

7. Next, Place a damp wash rag on top of the fabric and place your hot iron over the top of the damp cloth. You can also take a spray bottle and make the fabric damp. The steam created helps the Stitch Witchery to heat up and activate.

8. Now for the sides. Run a piece of Stitch Witchery length wise and cut to fit. Fold the fabric where your markings are. This time be sure to fold the fabric down ensuring a nice smooth line with the pillow case. Here you are using the Stitch Witchery to attach the fabric to the pillow.
9. Repeat again for the opposite side.
10. Lastly, attach the bottom piece of the fabric to the pillowcase. Depending on how much weight you believe will be in the pillowcase you may want to consider doubling up the amount of Stitch Witchery on the bottom, as well as the handles.

I used only one layer of Stitch Witchery for the bottom of this one and it held 4 books, box of crayons and a blu-ray!
Attach the Handle

11. Attaching the handle is super simple. Find the seam in the top of the pillowcase. Place two 1” pieces of Stitch Witchery together and place on the bottom of the handle. Be sure to dampen the handle with water or a damp cloth so the Stitch Witchery can adhere properly before you place the iron on top to activate. Continue for the other side of the handle.
Hint: DO NOT TOUCH until it’s completely dry!
12. If you are going to use a piece of felt it’s super easy…and cheap! Place the felt at the top of the pillowcase and lay under the fabric/pocket. Place a piece of Stitch Witchery underneath the top of the felt and iron down (make sure felt is wet or use damp cloth) to attach to the pillowcase itself. You’ll want to leave about a 1/2” from the top of the “pocket” so the kiddos can take the flap out when they are creating their designs!

Let the No-Sew Travel Pillowcase cool completely before you present to the kids and start stuffing it full of goodies! Not only is this No-Sew Travel Pillowcase now completely customized, but, you should expect to spend under $20.
The total cost for my No-Sew Travel Pillowcase was under $10! Here’s how it broke down:
- 2 pack of Standard Pillowcases from Room Essentials that I purchased at Target for $9.99, $4.98
- 1/2 yard of fabric, $3
- ½ Braid (Handle), $2.10
- 1 Felt Square, $.20
- Stitch Witchery, $3.79
There was enough material left over that with another handle I could’ve made two of these Travel Pillowcases just a little over $20!
Now I plan on heading to Michael’s when I have a 40%-50% off coupon in hand for the Pre-Made felt scenes. They are usually $7.99, but, there’s not many pieces in the kits so purchasing a few at a time is a good idea! Hancock Fabrics had the felt letters that you see above and were priced at $5.99, but, we are using that for another project 😉

If you are looking for a unique birthday or Christmas gift to give I’d suggest making the special kiddo a customized No-Sew Travel Pillowcase. To make it extra special you can even stuff full of toys, coloring books, crayons (check out this DIY Crayons Travel Case) and games to use while traveling down the road! Be sure to pick up some extra Back To School Supplies to stockpile too!
This No-Sew Travel Pillow Case is perfect for Summer Travel! It makes a fun alternative to an Easter Basket or Christmas stocking too!
You may enjoy these Kids/Summer Fun Crafts and make a few memories along the way:
Fun and Frugal Summer Fun and Projects & Ideas
Exploding Colors :: A Rainbow of Fun Science Experiment
Pepper Experiment :: A Fun Science Lab Experiment
Crayola Community – Free Coloring Pages
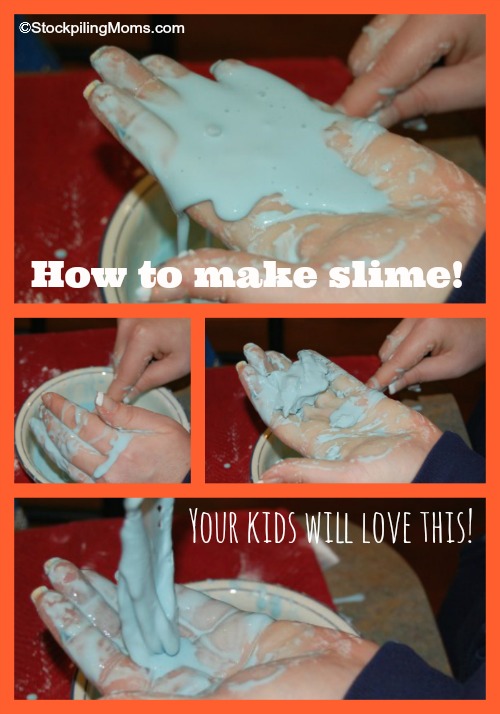
How to Make Your Own Slushy Magic

Melissa is a football and soccer mom who has been married to her best friend for 24 years. She loves sharing recipes, travel reviews and tips that focus on helping busy families make memories.