How to set up an antique booth
Want to know how to set up an antique booth? I recently took the plunge and started a new adventure. I rented a vendor booth at my local mini mall.
How to set up an antique booth:
First of all do your research. You want to choose a location that is reputable and where your items will be a good fit. I was on a waiting list for 8 months at the mini mall where my booth is located. I chose my vendor location because I am a regular shopper there, the owner has a good social media presence and it has a good location and parking. All of this was important to me.
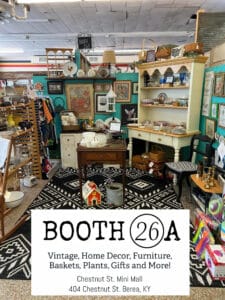
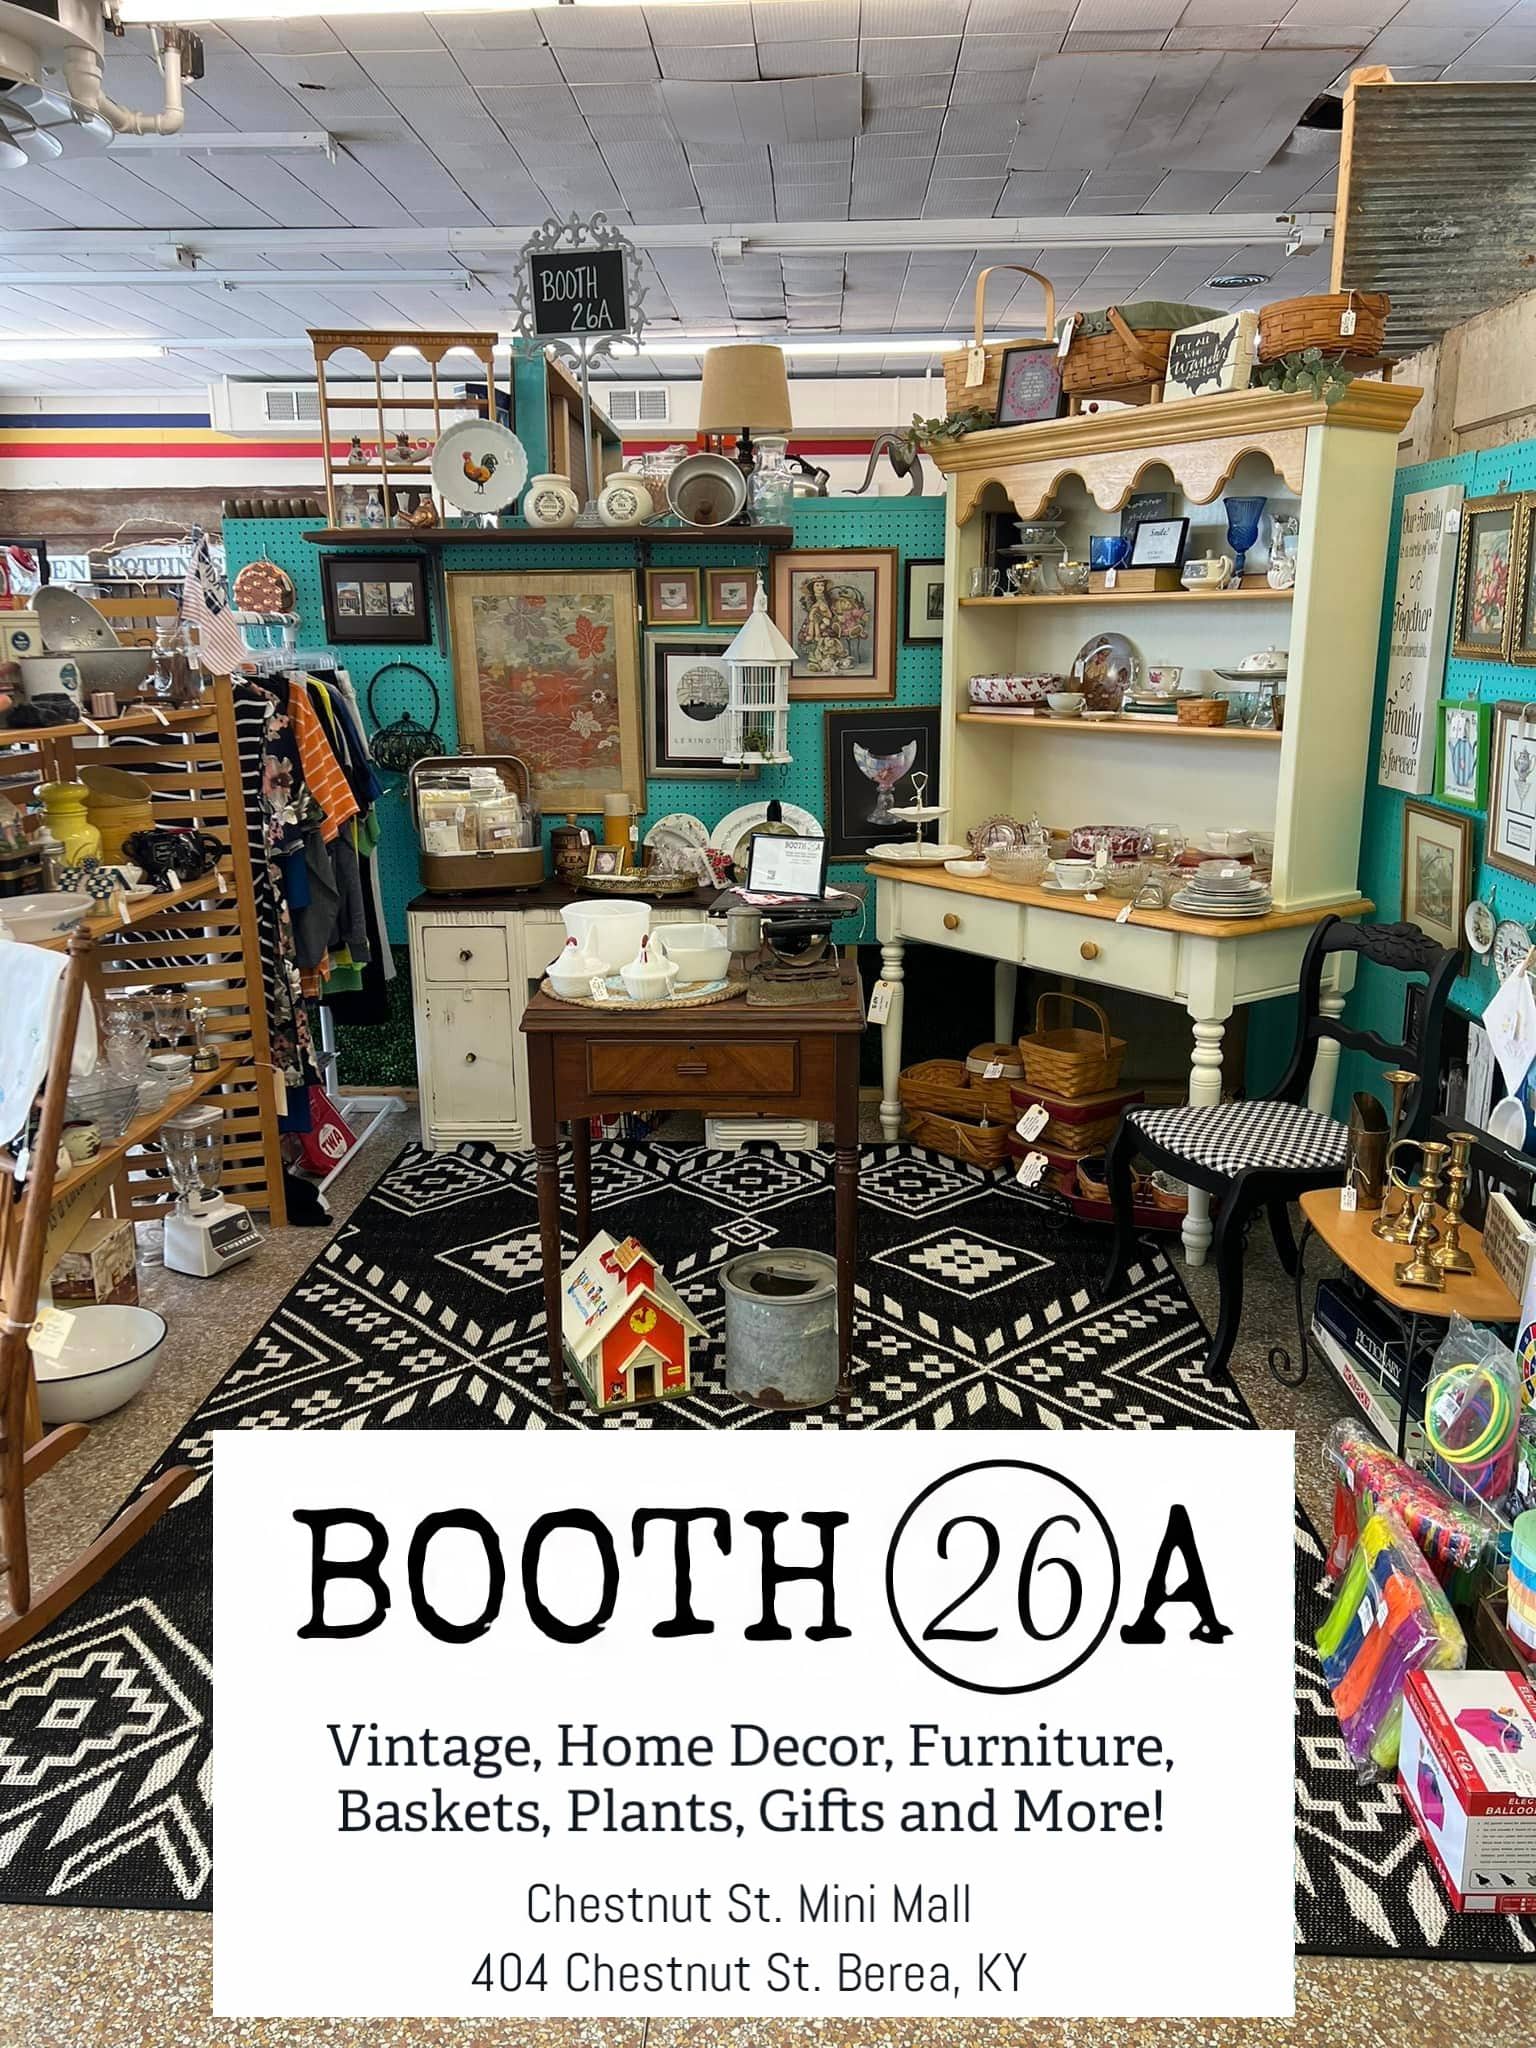
My booth is Booth 26A located at Todd’s Antiques and Vendor Mall. The address is 1305 Paint Lick Road, Berea, KY.
I also factored in the cost, hours of operation and that it was clean, and the owner has requirements for the booths. After selecting your location and placing your name on the waiting list you need to be prepared as you check back to see how many people are ahead of you on the waiting list. Once a booth becomes available you may have 10-14 days before you take over the rental and need to fill your booth.
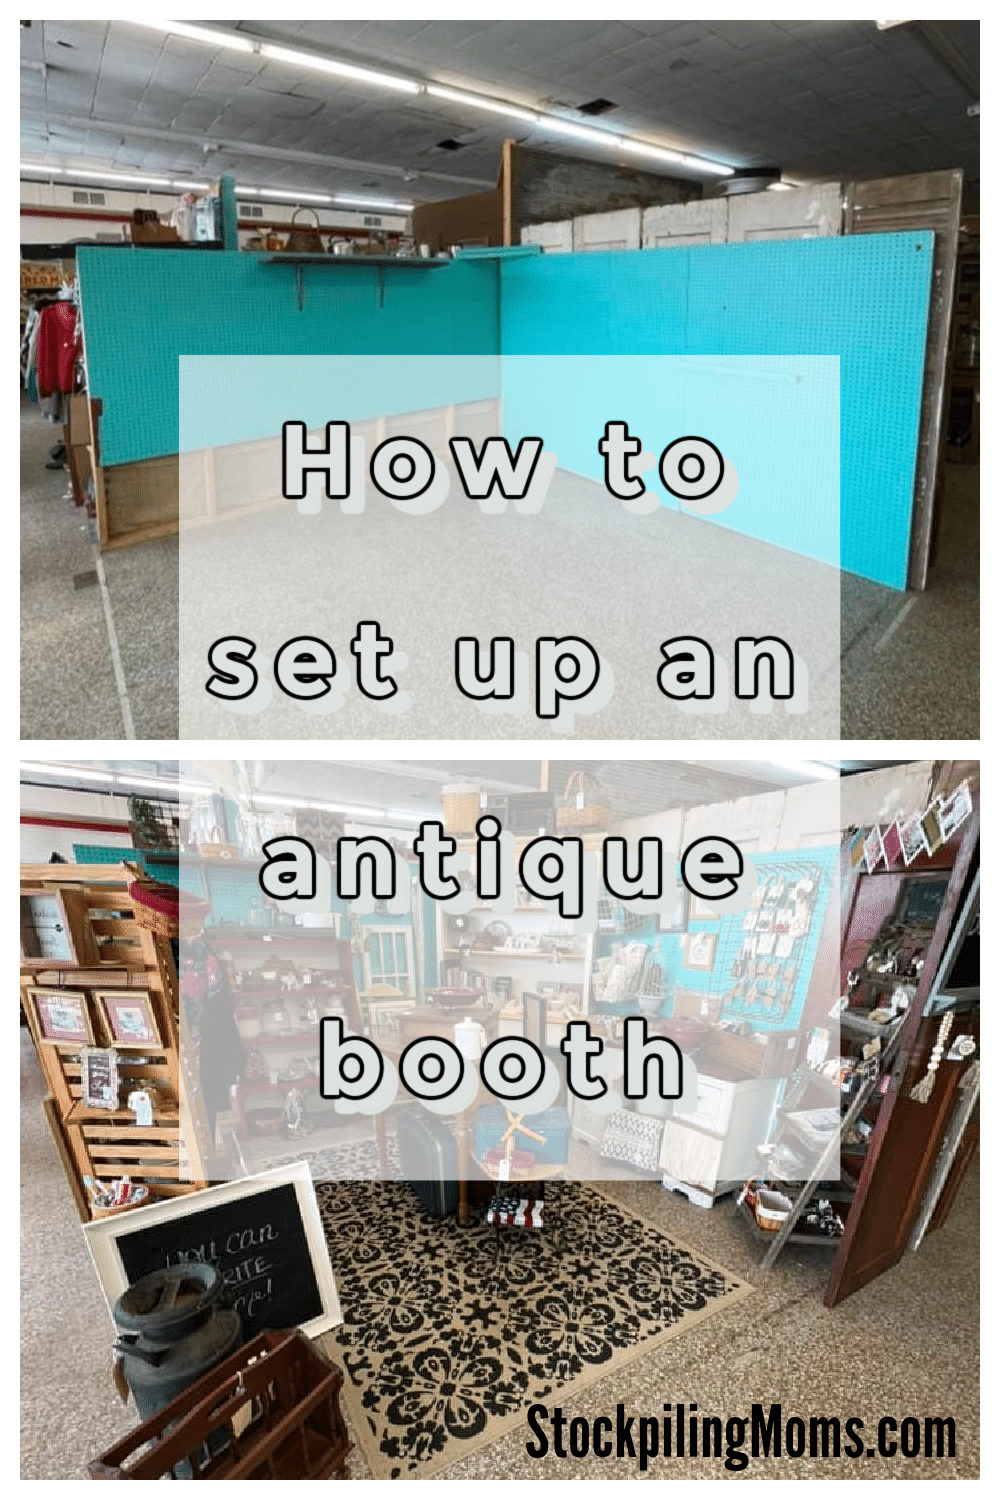
Branding: I chose to brand with a booth number. It is easy for recognition instead of naming our booth. Also, I have an easy description, so it is easy to find. It is the first when you enter from the street with teal walls! You honestly can’t miss it! It is my favorite color, so I was thrilled when this booth became available. I chose to create social media for Instagram and Facebook (in case you want to follow along).
Finding display furniture: I asked my friends and family if they had anything we could borrow. I was so happy when they said yes! I looked online and found a couple items for FREE! I also purchased two items from the mini mall where my booth would open. The owner held one for me and a booth owner held another! It is important to mark all of the furniture and display items with tags that say (NFS) so that customers will know they are not available.
Use a rug to warm up the space: I used an indoor-outdoor rug to warm up the space. This rug works perfectly because it is neutral, and it also doesn’t cause a tripping hazard. If your rug won’t lay flat, then use a sticky rug tape to hold it into place.
Stock your booth with a variety of prices: The basic rule of thumb is to have some high end, lots of middle range and then stock your booth with low end items too. You want to consider that 50% is middle priced and then 25% is high and low to reach all of the potential customers. If you rely solely on big ticket items you will not have sales daily. There are a couple vendors in the mini mall where I am located that only sell a couple of items each week because they don’t carry low priced items. A tip is that low price items add up!
Include clothing: At our mini mall clothing does extremely well because it is located close to Berea College. If your booth is located close to a campus you will want to consider items that tailor to students needs. A small clothing rack in your booth is a good way to rid yourself of unwanted clothes and help others at the same time.
Inventory and pricing: It is important to keep a detailed inventory of every item you take to your booth. This will help you to know what is selling, if you have a misplaced or stolen item and also to keep records for tax purposes. We use a spreadsheet to keep track, here is the Inventory Template I use. Also use inexpensive tags with clear descriptions and pricing.
I hope this helps you as you are starting out! Remember you don’t have to have the perfect booth on day one! Continually add and tweak things to make it your own.

Melissa is a football and soccer mom who has been married to her best friend for 24 years. She loves sharing recipes, travel reviews and tips that focus on helping busy families make memories.